Ready to embark on your course creation journey? Look no further! We've got your back with this step-by-step guide to help you start a brand-new course.
Step 1: Accessing Your Course Dashboard
Begin by clicking the "Profile" icon. Click on "My Courses" from the menu. You'll be taken to your courses dashboard.


Step 2: Starting a New Course
Within the dashboard, find the instructor's navigation links on the left side. Click on "My Courses" to view your existing courses.

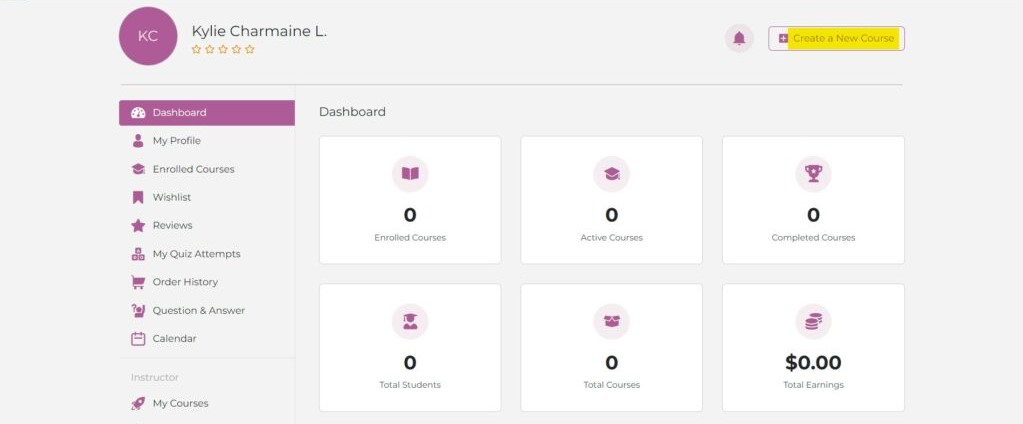
At the top right corner of the dashboard, you'll spot the "Create a New Course" button.
Click this button to initiate the course creation process.
Step 3: Course Creation Page
After clicking "Create a New Course," you'll be redirected to the course creation page.
Here, you'll find "Course Upload Tips" on the right and a step-by-step guide on the left, divided into 8 parts.

Part 1: Course Info
Under "Course Info," you'll find:
- Course Title: Start by entering your course title in the provided box.
- Course Slug: Create a simplified, URL-friendly version of the course title. Use lowercase, hyphens, or underscores to separate words, avoiding special characters or spaces.
- About Course: Write a brief description of your course, which could include an outline or other relevant information.

4. Course Settings: Here's what you can do under "Course Settings":
- Maximum Students: Specify the number of students who can enroll in the course. Set it to 0 for no limits.
- Difficulty Level: Choose the course difficulty level, whether it's for beginners, intermediates, experts, or all levels.
- Enrollment Expiration: Set the enrollment expiration. Student enrollments will be removed after this number of days. Set it to 0 for lifetime enrollment.
- Public Course: Toggle to make the course public with no enrollment required.
- Q&A: Toggle to enable or disable the Q&A section for your course.

5. Choose a Category: You'll find a dropdown arrow to select a course category. Alternatively, you can simply type the category in the provided box to search for it.
6. Course Price: Decide whether you want to offer your course for free or charge a fee. If you select "Paid," you'll need to provide both the regular price and the discounted price, if applicable. Enter the desired amounts in the provided boxes. Please note that the amounts should be in dollars.
7. Course Thumbnail: Upload an image that will serve as the thumbnail for your course. Click the "Upload Image" button to add your chosen image.

Part 2: Video
In this section, you can upload your introductory video for your course. You'll find options to select your video source, including HTML 5 (mp4), YouTube, Vimeo, or Embedded. Once you've chosen the source, you can either drag and drop your video or use the browse file button.

Part 3: Course Builder
Here, you can add new topics or sections to your course.


Part 4: Google Meet
Use this section to connect with your students via Google Meet. Click "Create a Google Meet," then fill out the required information such as Meeting Name, Meeting Summary, Meeting Time, and Timezone. Once complete, hit the "Create Meeting" button.


Part 5: Instructors
In this section, you'll see your name listed as the instructor. If you wish to add another instructor, click the "Add Instructor" button. You can then search for the instructor's name and save the changes.


Part 6: Course Attachment
Use this section to upload course attachments, such as training materials, PowerPoint presentations, videos, and more.

Part 7: Additional Data
This part provides an overview of your course. Under "Additional Data," you'll find:
- What Will I Learn: Describe the course benefits.
- Targeted Audience: Specify the target audience that will benefit the most from the course.
- Total Course Duration: Indicate the total duration of the course in hours and minutes.
- Materials Included: List the assets you'll be providing to students in this course.

- Requirements/Instructions: Include any additional requirements or special instructions for students.
- Course Tag: Add a short description or categorization. Choose tags that students can easily search.

Part 8: Certificate Template
In this section, you'll find templates that you can choose for creating certificates for your students

Once you've filled out all the required information, return to the top of the page. At the upper right corner, you'll see the "Publish" button. Click it to publish your course. You can also preview it before hitting the publish button.

Congratulations! You've successfully created a new course! Your journey as an educator has begun.


That's it! You're now ready to share your knowledge and expertise with eager learners. Good luck with your course creation!