Welcome to DIYvinci Design Studio, where your creative ideas come to life. Follow these steps to master the art of freehand drawing in DIYvinci:
Step 1: Access the Design Studio
There are two ways to enter the Design Studio:
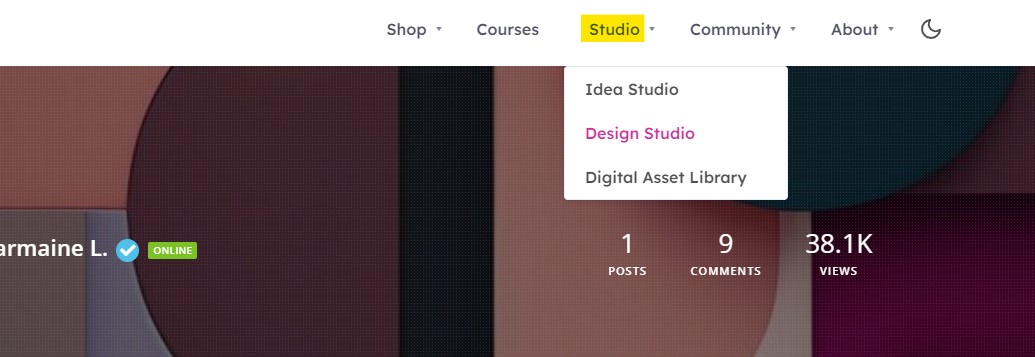
Option 1: If you're on the diyvinci.com website, hover over "Studio" at the top of the page and select "Design Studio."

Option 2: If you're on your profile account, hover over the top options. Click "Studio," then choose "Design Studio."
Step 2: Create a Blank Canvas
Once you’re in the Design Studio, you’ll find various options. Select the “Blank Canvas” tab. Customize your canvas by adjusting size, width, height, and background color. Click the “Create” button to start your freehand drawing.


Step 3: Access Drawing Tools
In the left panel, find the "Brushes" icon. Click it to unveil the "Start Drawing" button, and then click the "Start Drawing" button.


Step 4: Customize Your Drawing Experience
After clicking "Start Drawing," you'll find various options to personalize your drawing experience:

Stop Drawing: Click this button to halt your drawing activity. It's essential to stop drawing to access other tools in the Design Studio and make the "Save or Download" button clickable.
Undo Button or Arrow Icon: Use this feature to undo the previous action or stroke, allowing you to correct mistakes or make changes to your artwork.

Brush Type: Choose from a selection of brush types, each offering unique effects. Experiment with different brush types to achieve your desired artistic style.

Brush Width: Adjust the brush width to control the thickness of your lines. Wider brushes create bolder strokes, while narrower ones enable fine details.

Brush Color: Explore a palette of colors to add vibrancy to your artwork. Select colors that match your creative vision and bring your ideas to life.

Brush Shadow: Toggle this option to add shadow effects to your brush strokes. If turned on, you'll access shadow settings, allowing you to customize the appearance of the shadow effect applied to your artwork:

Blur: Control the softness or sharpness of the shadow. Increase the blur value for a diffuse effect and decrease it for a sharper shadow.
Offset X and Offset Y: Determine the shadow's horizontal (X) and vertical (Y) position in relation to the brush stroke, giving you control over its direction and distance.
Color: Choose the hue and transparency of the shadow, enabling seamless blending or unique visual effects.
Note: Drawing Straight Lines
You can draw a straight line by pressing the shift key while drawing. This handy feature helps you create precise lines in your artwork.
Step 5: Stop Drawing
Once you've completed your project or drawing, remember to click the "Stop Drawing" button. Failing to do so will prevent you from using other tools in the Design Studio and make the "Save or Download" button unclickable.
Step 6: Save or Download Your Artwork
To save or download your creation, find the "Save or Download" button at the top left of the screen. Click the button to reveal two tabs: "Save" and "Download."

Save:
Select the "Save" tab. Modify the file name as needed and click the "Save as Image" button to save your artwork.

Download:
Choose the "Download" tab. Modify the file name if desired and click the "Download as Image" button to download your masterpiece.

That's it! You've mastered the art of freehand drawing in DIYvinci Design Studio. If you have any questions or need further assistance, please don't hesitate to reach out to us. We're here to help you unleash your creativity. Thank you for choosing DIYvinci!